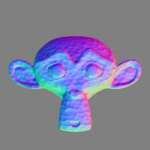
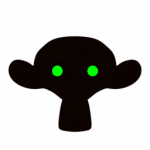
Both “ΔV” and “In Dead Company” use 2D sprites with normal maps to make 3D visual lighting effect. Oversimplifying, a normal map is a map showing where each pixel of the sprite faces. It’s a map of 3D vectors represented usually by RGB image. Your engine can combine shadeless sprite, a normal map and light source data do crate nice shading on-the-fly. I’m creating all my normal maps and sprites with Blender – a 3D rendering and modeling software. Here is how to set up a normal maps rendering in blender for use in Godot 3 built-in normal mapping.
TL;DR:
- Download example blender scene: normal-maps
- Unpack and render
- Done!
How to setup normal-map rendering pipeline in Blender
First of all, you will need a Blender. It’s a free, open-source 3D rendering and modeling software, capable of great feats. It has ton of options and it actually took me a while to make reliable normal map output from it. Normal mapping in blender usually means that surfaces of the model are rendered with normal maps, and I’ll be making something different – asking Blender to add a normal-map information to its render output. You can render pretty much any scene with it (sprites, background – anything goes) and add light to it in your engine.
I’m working with Godot engine and those normal maps are adjusted to what Godot expects – but you can use this technique with any engine with minor (if any) change.
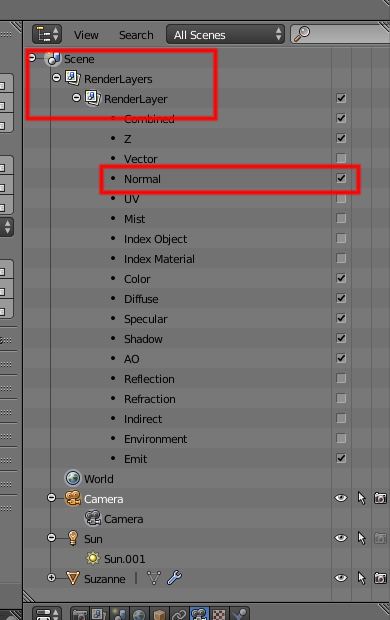
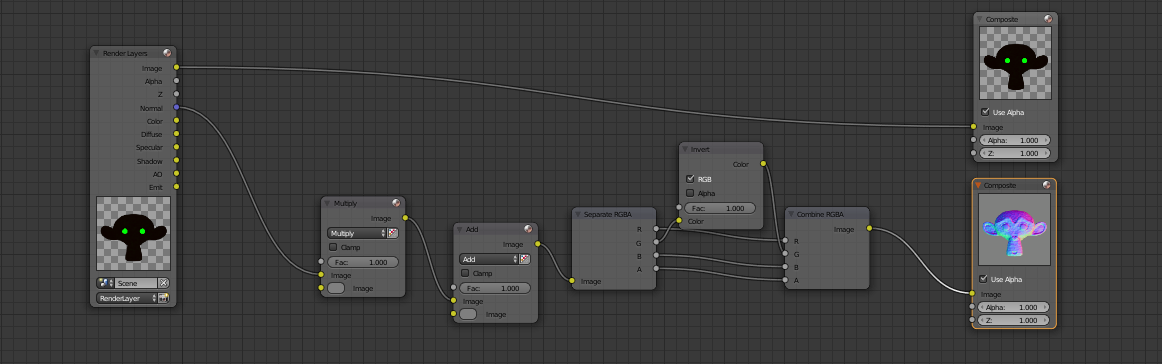
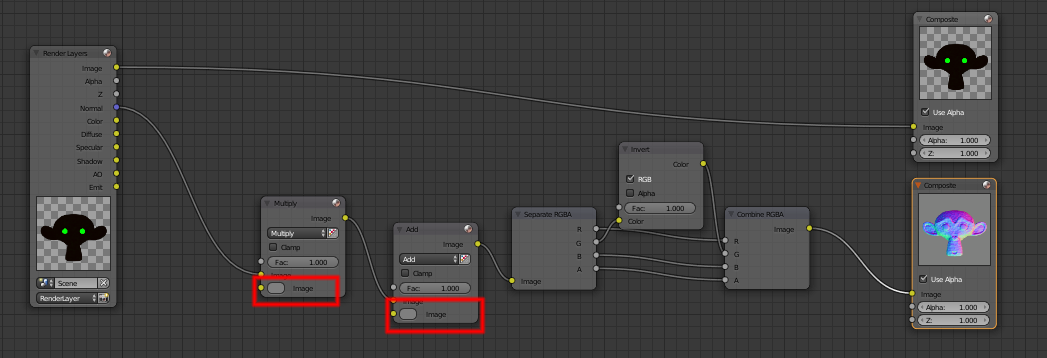
I will be using Cycles renderer. Blender already has all information that normal-map requires when it’s rendering, so all we have to do is to ask him to show it to us:
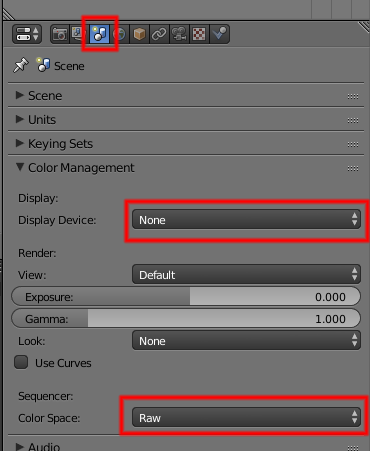
Fortunately, Blender does all the work. Unfortunately – it’s color space is different from what Godot expects. It can be adjusted with following setup:
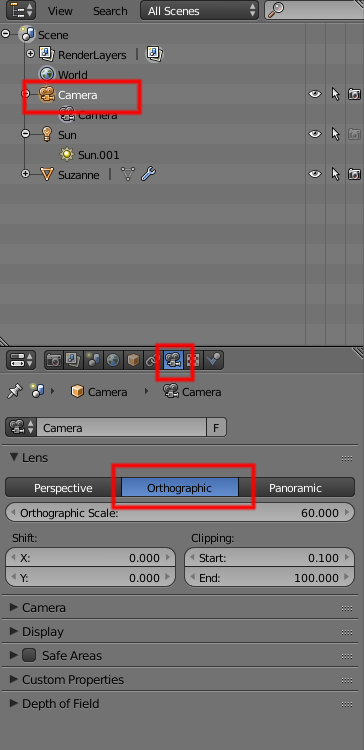
Now we need to disable color management and set up transparent output, so we can use our renders as sprites out-of-the-box. It might be a good idea to set your camera to orthographic when rendering sprites, so perspective will not distort the image. Normals outputted from blender will be oriented in the global space – your camera has to be above the scene, facing down for this setup to work.
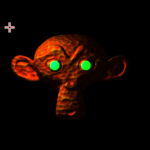
At this point we are pretty much done. Any image rendered now will have both color and normal outputs. In most cases you will not want a light in your scene – lights will be handled by game engine. At this point you can render sprites just like these in ΔV:
PS. Be sure to use latest Blender build, there was a bug in 2.79 what made materials not to be rendered into normal maps.
Hello, I loved what you did there and could not find any other source like this, clear enough. However, I am new to blender and with 2.8 many things changed in the UI. So I don’t know how to implement this to my new version Blender. Can you please help me?